Login Instructions
- Click the link to go to West Print Order System
- Enter your full email address ([email protected])
- Enter your login password: the same password as used to log into your computer or email
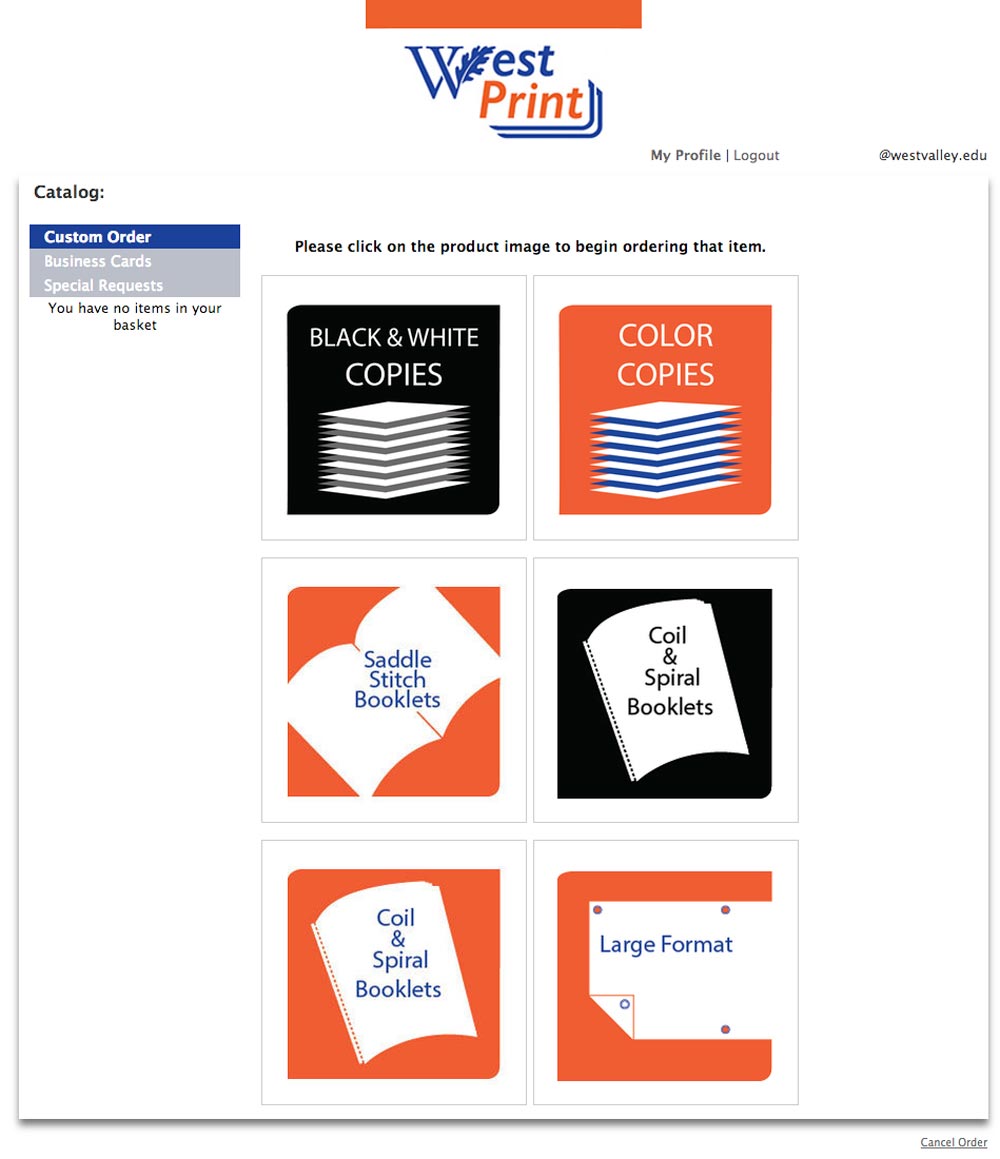
From the West Print homepage, select job type:
- Black and White Copies
- Color Copies
- Saddle Stitch Booklets
- Coil and Sprial Booklets – Black and White
- Coil and Sprial Booklets – Color
- Large Format
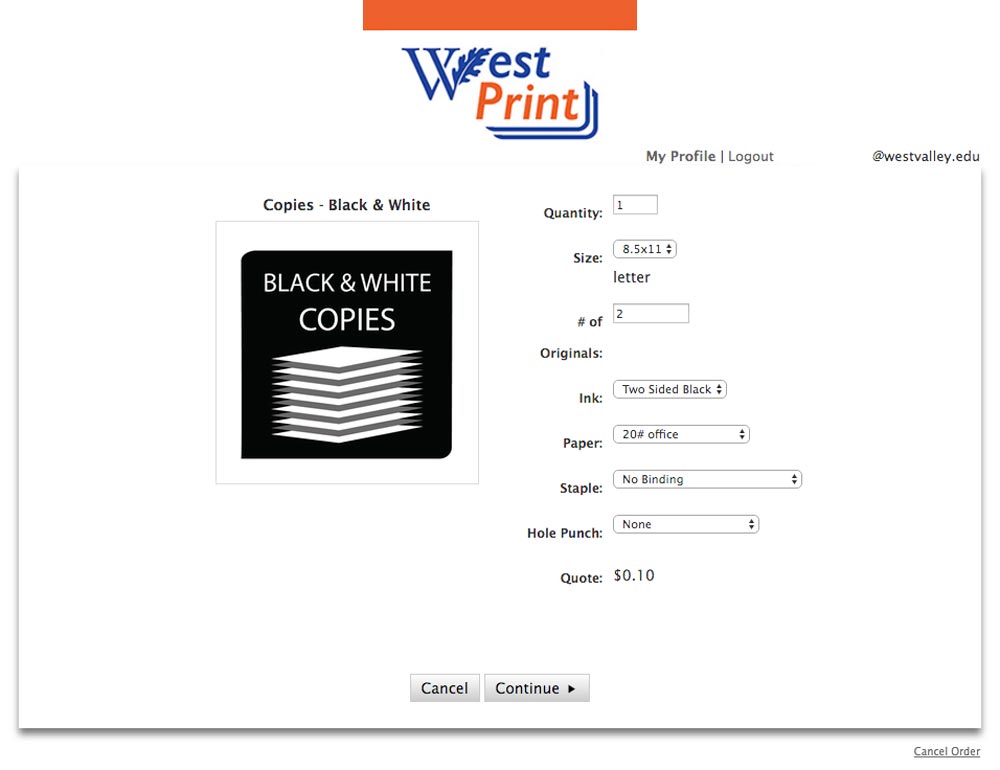
Provide the Required Information
- Quantity
- Size
- Number of Originals
- Ink: Two-Sided or One-Sided
- Paper Type
- Staple: Binding
- Hole Punch
You will not be able to proceed through each stage before filling out the essential details to complete your job.
Please Consider the Following
- The default output is double-sided.
- You will be able to see a preview of the costs associated to the makeup of your request.
- Most importantly, the number of originals entered here must correspond exactly to the number of originals in your file or you will not be able to complete your request.
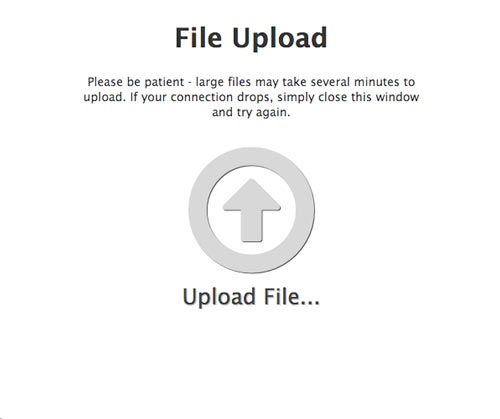
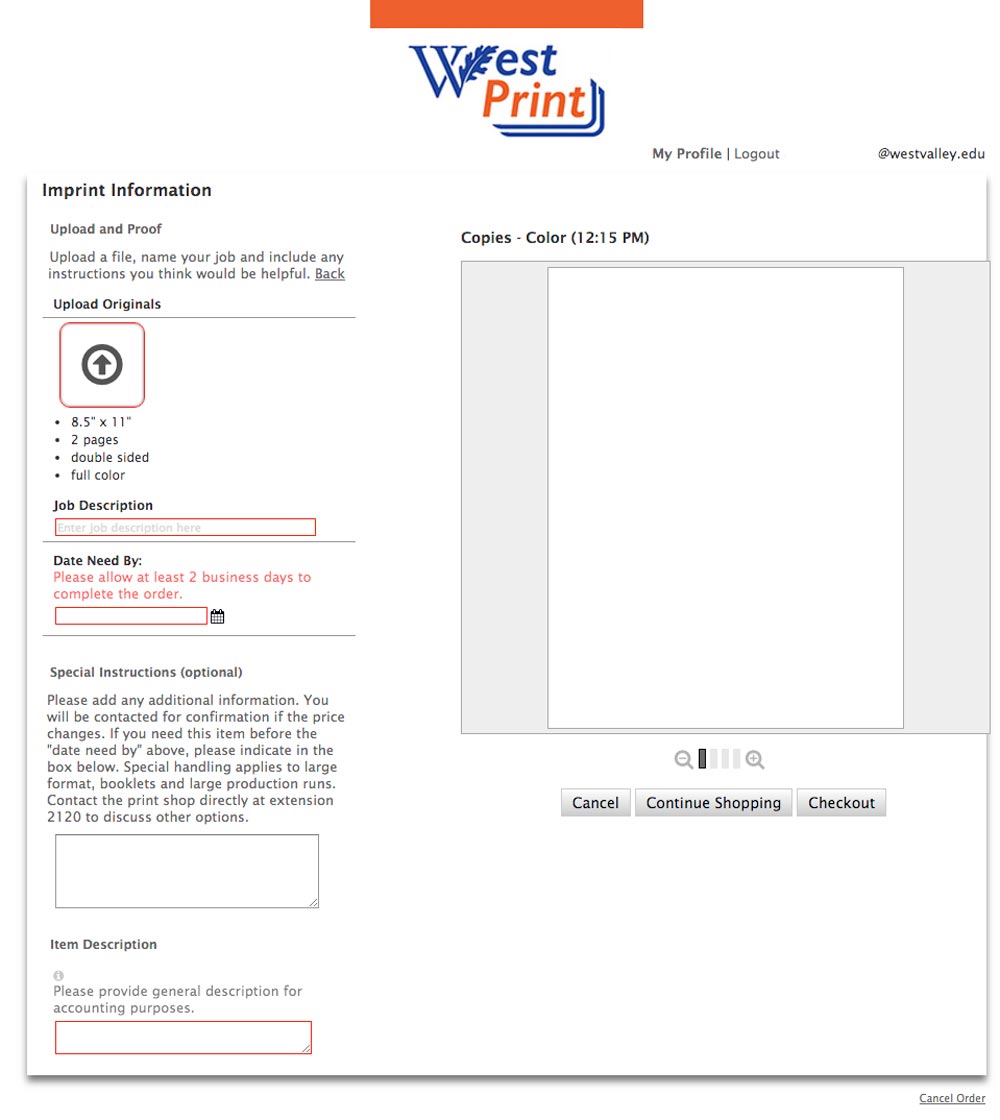
- Click on the Upload Originals button.
- From the File Upload window, click on the arrow within the circle icon to browse your computer for the appropriate file.
To avoid confusion or challenges, make sure to save and upload digital files that correspond to conventional US paper standards for size. Remember to make sure that your number of originals in your file match up to the request. Be aware: the upload process will resize your documents to an available paper size, but you may see some unexpected formatting effects when previewing the upload of your file from this page.
Job Description
Enter description for print job.
Date Needed By
Printing for Syllabi, Classwork, and Exams receive priority, 2 business day scheduling for routine black and white 8 ½”x11” or 8 ½”x14” orders.
Allow 5 to 10 business days for Promotional, Posters, Stationery, or orders that require special handling.
Special Instructions
This section has been disabled – please do not enter any information.
Item Description
Choose one of the following:
- Classwork (including syllabi)
- Exams
- Promotional Materials (for classes and events)
- Stationery (including envelopes and letterhead)
Please designate the color of paper selected in the Item Description box.
Checkout or Continue Shopping
Select Checkout to proceed or Continue Shopping to build another request.
Accept Proof
Affirm approval of the job preview.
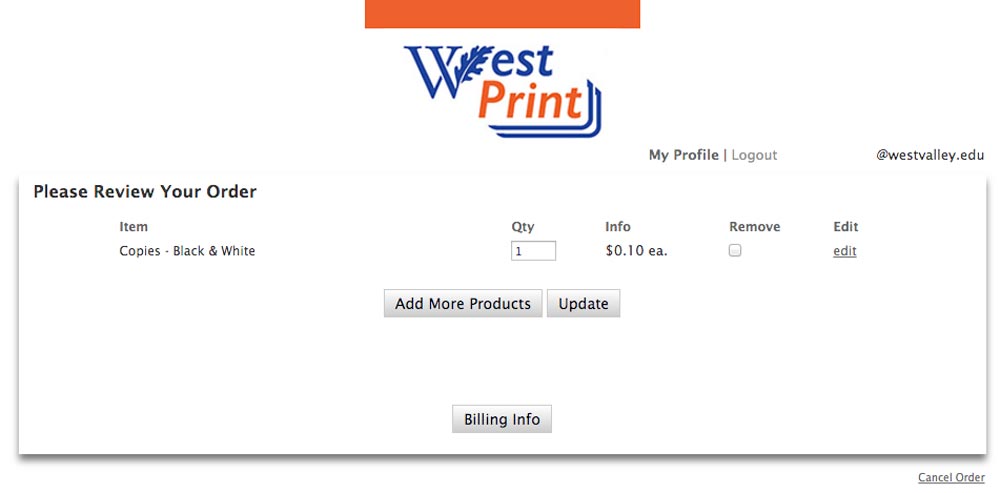
- Confirm job quantity and cost for job(s).
- Select Billing Info to proceed.
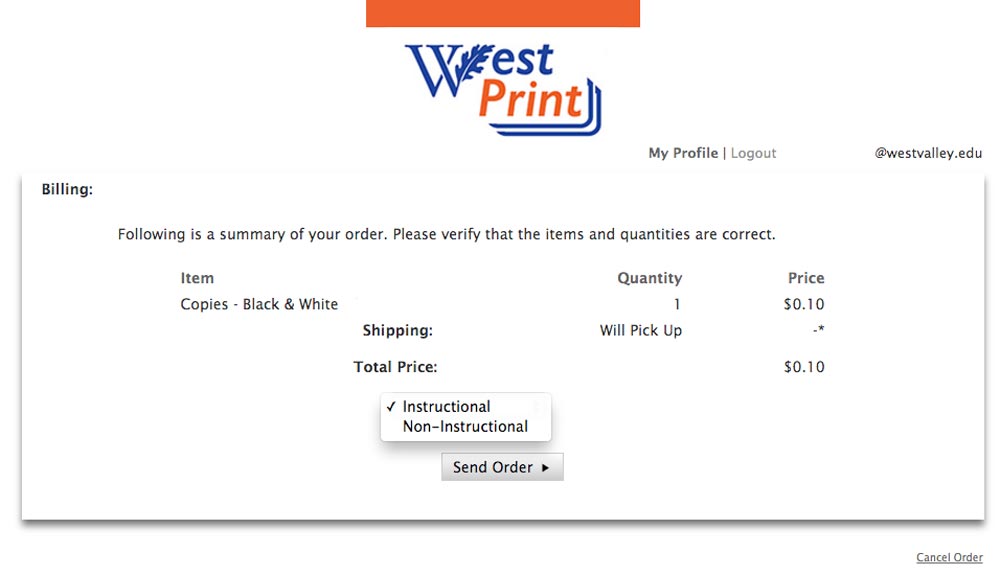
- Select Instructional or Non-Instructional for job.
- Select Send Order to submit job.
- An email will be sent with confirmation number, job details, and document preview.
General Instructions
- After Landing on the Menu Page, select the large button labeled Black and White Copies.
- At the top of the Black and White ordering page In the Quantity box, enter the total number of finished sets or pieces you would like printed.
- Under # of originals, you will need to enter the total number of pages within your file. If the number you provide does not accurately match the page count of the file, you won’t be able to complete the order. If the page count of the file you are uploading seems off, check to make sure you don’t have any unwanted, or additional blank pages within the body or at the end of your document. You will either need to delete or account for any extra pages.
- Under Ink, you can select either Single or Double-sided copies.
- For Paper options, first select the paper type as this determines which Paper sizes will be available to order from. Office bond is the default and recommended for most B&W office use.
- To select a Paper Color other than the default white, you fill first need to select either; Pastel bond or Astro-Bright text for light weight paper options or the Pastel Cover or Astro-Bright cover for heavier weight colored paper. After making your paper color selection you should see the color selected appear in the box below. The pastel colors available are the same traditional office colors you may have experienced before with the Astro Bright options being richer, more vibrant colors which are great for presentations or signage but can sometimes be more difficult to read and for capturing small print or fine detail.
- In the size tab after you have selected the paper type you will see different sizes become available for the different media. Some media are only available in 8.5” x 11” also known as standard letter size. We also carry the regular office bond and digital laser paper in 11” x 17” or tabloid size however for presentation pieces or posters we recommend 12” x 18” as it is compatible with our other devices used to produce items like postcards and theater tickets.
- Staple option gives you three choices; either no binding, a single staple in the top left corner or two staples on the left side of the document.
- We offer collated and uncollated printing, which can be selected from the collation tab.
- When selecting hole punch and folding options you will see a graphic representation of the different options. A finished half folded piece will yield an 8.5” x 5.5” item. Brochure fold is what you would select for a tri-fold brochure, where the z-fold is more commonly used for mailed items like letters.
- Click the continue button on the bottom of the page, to continue the ordering process.
- For more detailed information regarding paper types and available sizes please review our Print Media paper key.
- After Landing on the Menu Page, select the large orange button labeled Color Copies.
- At the top of the Color ordering page In the Quantity box, enter the total number of finished sets or pieces you would like printed.
- Under # of originals, you will need to enter the total number of pages within your file. If the number you provide does not accurately match the page count of the file, you won’t be able to complete the order. If the page count of the file you are uploading seems off, check to make sure you don’t have any unwanted, or additional blank pages within the body or at the end of your document. You will either need to delete or account for any extra pages.
- Under Ink, you can select either Single or Double-sided copies.
- For Paper options, first select the paper type as this determines which Paper sizes will be available to order from. Laser Text is the default for color copies and recommended for general office use, gloss refers to paper with a shiny finish good for presentations, while text and cover refer to paper weight with text being the lighter weight used in office work and cover being similar weight to cardstock or business card paper.
- >In the size tab after you have selected the paper type you will see different sizes become available for the different media. Some media are only available in 8.5” x 11” also known as standard letter size. We also carry the regular office bond and digital laser paper in 11” x 17” or tabloid size however for presentation pieces or posters we recommend 12” x 18” as it is compatible with our other devices used to produce items like postcards and theater tickets. Please note, 11” x 17” is a different proportion than 12” x 18” and is not interchangeable.
- >Staple option gives you three choices; either no binding, a single staple in the top left corner or two staples on the left side of the document.
- We offer collated and uncollated printing, which can be selected from the collation tab.
- When selecting hole punch and folding options you will see a graphic representation of the different options. A finished half-folded standard letter size sheet (8.5” x 11”) will yield an 8.5” x 5.5” item. Brochure fold is what you would select for a tri-fold brochure, where the z-fold is more commonly used for mailed items like letters.
- Click the continue button on the bottom of the page, to continue the ordering process.
- For more detailed information regarding paper types and available sizes please review our Print Media paper key.
Standard Submission Guidelines
Please consider others when submitting print requests. The beginning of each semester, midterm exam, and final exam periods are peak print request times. Allow extra time for printing during these busy times of the semesters.
- 2 full business days required for standard black and white print requests that do not require special handling.
- You may submit as many print jobs as needed at one time but always include the “Date Need By”
- Do not request more than 10 jobs for completion per two day window with respect to other requestors and ongoing print shop responsibilities. Prioritize your print requests using the “Date Need By”
- Allow at least 5 full business days if requesting more than 2000 total impressions or copies.
- 3 full business days required for standard color print requests, which do not require special handling.
- You may submit as many print jobs as needed at one time but always include the “Date Need By”
- Do not request more than 10 jobs for completion per two day window with respect to other requestors and ongoing print shop responsibilities. Prioritize your print requests using the “Date Need By”
- Allow at least 5 full business days if requesting more than 1000 total impressions or copies, and at least 10 full business days if requesting 2500 or more total impressions or copies or non-standard size or special paper stock.
For best results, coordinate any “Special Handling” printing through the college’s Graphics department.
The Graphics department is accustomed to working with the college’s branding, print requirements, and equipment characteristics to provide best results. Allow sufficient time for graphics development, approvals of print proofs, and any special requirements – a minimum of five to ten full business days, depending on the specific project, which may include:
- Large format posters
- Banners
- Business cards
- Envelopes (orders limited to 500 envelopes)
- NCR
- Spiral, comb or ring bound items
Avoid submitting items that require special handling any later than three weeks before each semester and at least one week after the semester starts.
- To ensure that you receive your print requests before the start of each semester, make sure to submit all syllabi and classwork at least two full weeks before the desired pickup date.
- Use the “Date Need By” calendar to prioritize your print jobs; only 10 maximum print jobs scheduled per date unless more than two weeks lead time provided.
- Given the sheer volume of print requests at the start of each term, please limit your submissions to what will be needed in the first two to three weeks of class, not an entire semester’s schedule of materials. If, for convenience, you want to submit the entire term’s print requests, please submit each print job as an individual request, not multiple jobs combined, and at a minimum one month prior to the start of the term.
- Avoid submitting items that require special handling any later than three weeks before each semester and at least one week after the semester starts. No business cards, stationery, envelopes, or similar “stock” items will be printed during this period.
